CNC machined tiller arms

Jari sent me some pictures of tiller arms that he machined during the weekend.

These parts need to be machined in three separate stages, here's stage 1 where the tillers are first roughed and then finish milled.

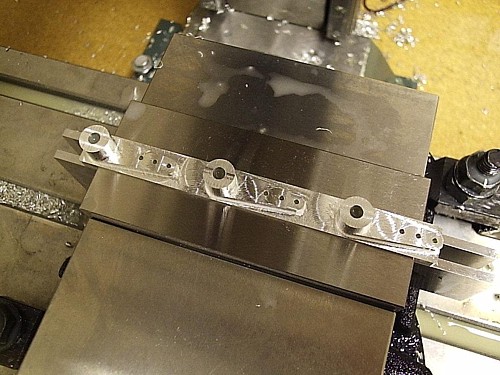
Here's what the parts look like after the first stage. After finishing the hole for the axle and three holes for the push-rod are drilled. In stage two the parts are turned 90 degrees and fixed using a jig. A hole can then be drilled and tapped for a set-screw that will tighten against the rudder axle.

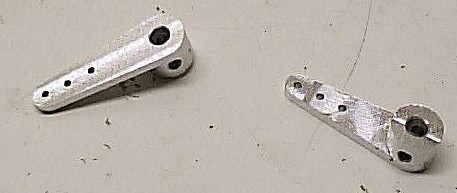
In stage three the whole thing is flipped over and the bottom of the stock material is machined off, which results in these completed parts.

These are still prototypes, for the Noux Mk2 I'd like to see two things: (1) assembly of the boat without tools, i.e. the attachment of the tiller arm to the rudder axle should not require any special tools (allen key, screw driver, etc.). This could be achieved with the current design simply by using a screw with a thumwheel. (2) a fixed relative position between tiller and rudder axle, i.e. when I attach the rudder I want to be sure it sits straight without having to check it everytime and possibly re-trim on the transmitter. A low-tech solution is to file or grind a flat part on the rudder axle onto which the set-screw pushes. If anyone has better ideas I'd be glad to hear about them !

Update 2006 Dec 05:

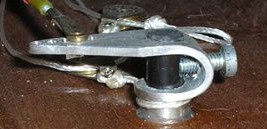
Johan Prak from the Netherlands sent me a picture of his homemade rudder fitting. A very simple design that anyone can make:

A new spindle for our Opti CNC mill

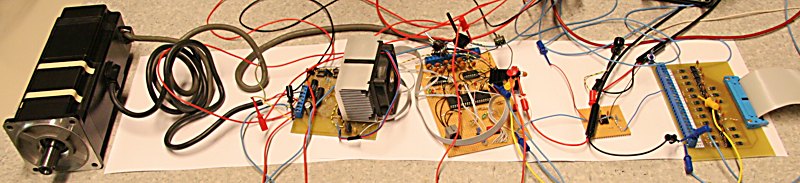
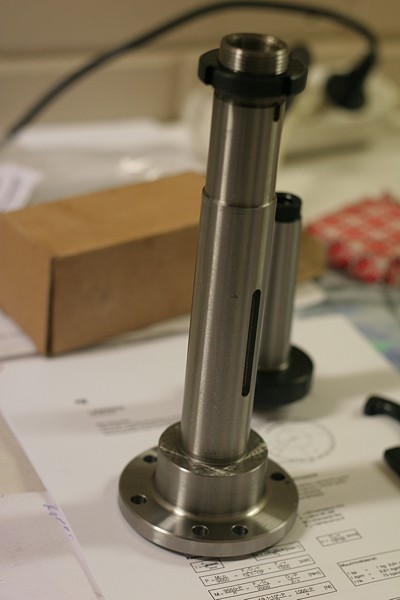
Jari has been busy planning and building a new spindle for our CNC mill. The project is now about half-way so I thought I'd take a few pictures and write some text.

So far we've been using the stock spindle on the Opti BF20 which has a Morse Taper #2. The original motor burned out at some point so we had to replace it. But as our machine has run for probably hundreds of hours already the bearings are showing some serious wear. We measured a runout of more than 0.05 mm...

On the left the new spindle, Morse Taper #3, from littlemachineshop, a bargain at $34.95 !. It's sold as a lathe spindle, but we thought we'd get the longest spindle they have to place the bearings as far apart as possible for rigidity.

This is part of a larger upgrade plan for the mill which will include replacing the dovetail ways of the stock mill with linear bearings, replacing the standard acme screws with ballscews, and upgrading the control electronics to use AC servos.

The linear bearings are 15mm wide and manufactured by IKO. We got the ballscews from metallstore (I think they are made by HiWin), and the Sanyo AC servos are from last years surpluscenter sellout of Sanyo AC servos. Three 400 W servos will direct-drive the ballscrews (I hope the torque will be more than enough, otherwise we will have to resort to gearing as is often done with servos). A 1 kW servo will be used as the spindle motor. I'm hoping that using a servo as the spindle motor will allow rigid-tapping eventually. Finding affordable servodrives for the AC motors (sinusoidal 3-phase commutation based on hall sensors and/or 2000 ppr encoder) is not easy, so I've actually had a go at building my own drive (also check out Tero Kontkanens effort).

Everything will be controlled by EMC, with a Mesa Electronics M5I20 PCI-card for I/O.

Some pictures of the spindle assembly and toolholders below...

Continue reading A new spindle for our Opti CNC mill

First Steps With Brushless Servodrive (Microchip dsPIC + IRF IRAMS)

Today I got the whole motion control chain from EMC2 on the pc through the Mesa m5i20 servo-card, homemade optoisolator card (far right), PWM to analog filter (small board on the right), servodrive (middle), powerstage (middle left, with heatsink), through to the motor (left, a Sanyo P5 1kW servo) working !

This is truly Open Source cnc: EMC is obviously an OpenSource project, but also the FPGA configuration on the m5i20 is published under the GPL, and my servodrive code will be available when it fully works.

The picture might seem messy with a whole lot of wires - but I can assure you that it's all very organized... 🙂

Continue reading First Steps With Brushless Servodrive (Microchip dsPIC + IRF IRAMS)

New Servos and Rails for CNC upgrade

Back in October-November Surpluscenter was 'giving away' brand new servos at 40usd/servo when the cost for new ones can be 1000+usd/servo ! So we just had to get these for our next cnc upgrade. Here are some 400 W Sanyo Denki P5 100VAC brushless servos. The bigger servo, third from the right is a 1 kW model. The catch is that these servos need an advanced servo amplifier/drive to operate. There are several amateur/open-source efforts which aim to produce such a drive cheaply or DIY:
http://www.cnczone.com/forums/showthread.php?t=14673
http://www.cnczone.com/forums/showthread.php?t=14477
and
http://www.cnczone.com/forums/showthread.php?t=14556

To finance the amplifier development/purchase and the rest of the upgrade, I am selling three of the 400W servos.

Below some IKO LWL 15 rails which will also be used:

Testing VFD and AC induction motor


The stock 600 W DC motor on the CNC-converted Opti BF 20 burned out and had to be replaced.

Jari got a 750 W ABB AC induction motor to replace it and found this used VFD for driving it. Here we are testing the VFD for the first time and it seems to work OK. Acceleration and braking speed is great compared to the old DC-drive.

There's a normally-open start switch (black), a normally closed stop switch (red), an SPDT direction switch (blue), and a linear 10k pot (black) for adjusting the speed. Next step is to build a proper front panel for the switches. The VFD also has a 0-5 V load output which would be nice to monitor while machining.

I've started a new category, CNC, for everything related to CNC control and machines. Hopefully I'll have more to post about these things in the future...