Drop-Cutter toroid edge test

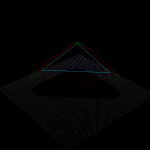
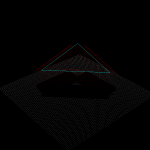
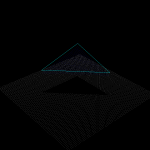
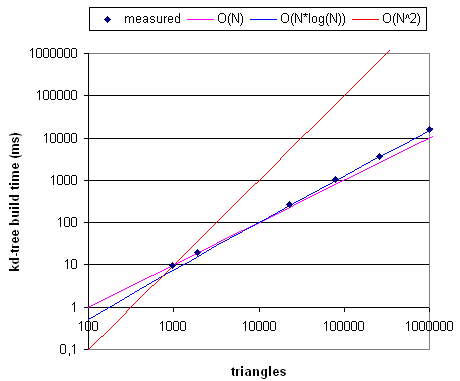
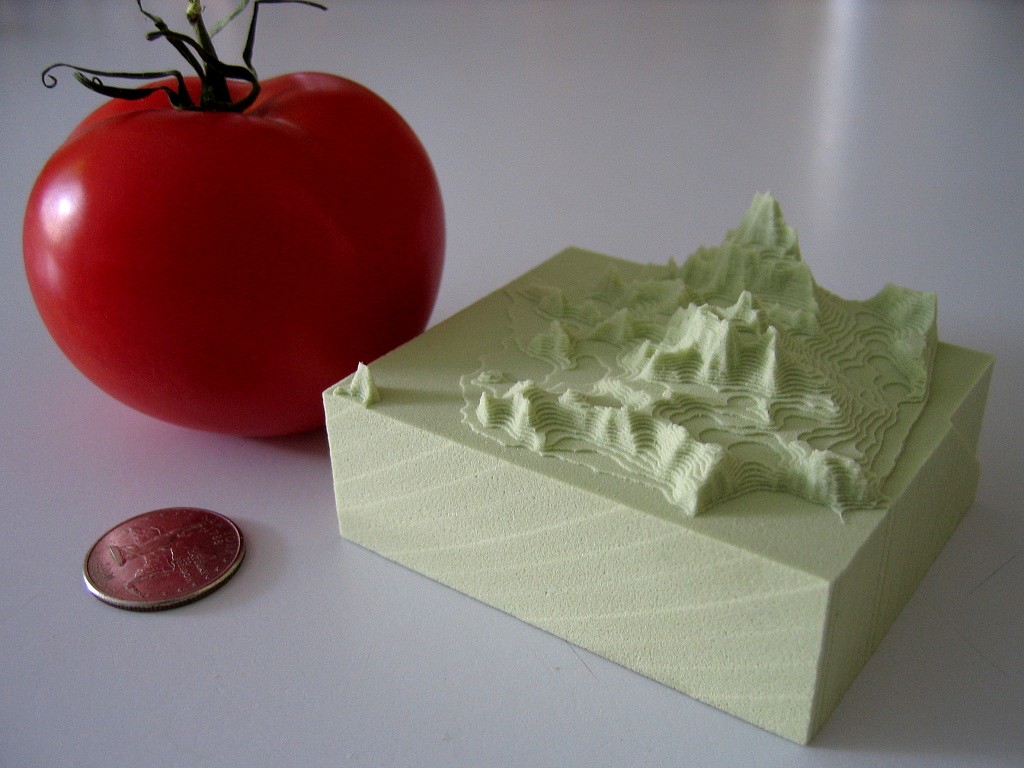
The basic CAM-algorithm called axial tool projection, or drop-cutter, works by dropping down a cutter along the z-axis, at a chosen (x,y) location, until we make contact with the CAD model. Since the CAD model consists of triangles, drop-cutter reduces to testing cutters against the triangle vertices, edges, and facets. The most advanced of the basic cutter shapes is the BullCutter, a.k.a. Toroidal cutter, a.k.a. Filleted endmill. On the other hand the most involved of the triangle-tests is the edge test. We thus conclude that the most complex code by far in drop-cutter is the torus edge test.

The opencamlib code that implements this is spread among a few files:

  • millingcutter.cpp translates/rotates the geometry into a "canonical" configuration with CL=(0,0), and the P1-P2 edge along the X-axis.
  • bullcutter.cpp creates the correct ellipse, calls the ellipse-solver, returns the result
  • ellipse.cpp ellipse geometry
  • ellipseposition.cpp represents a point along the perimeter of the ellipse
  • brent_zero.hpp has a general purpose root-finding algorithm

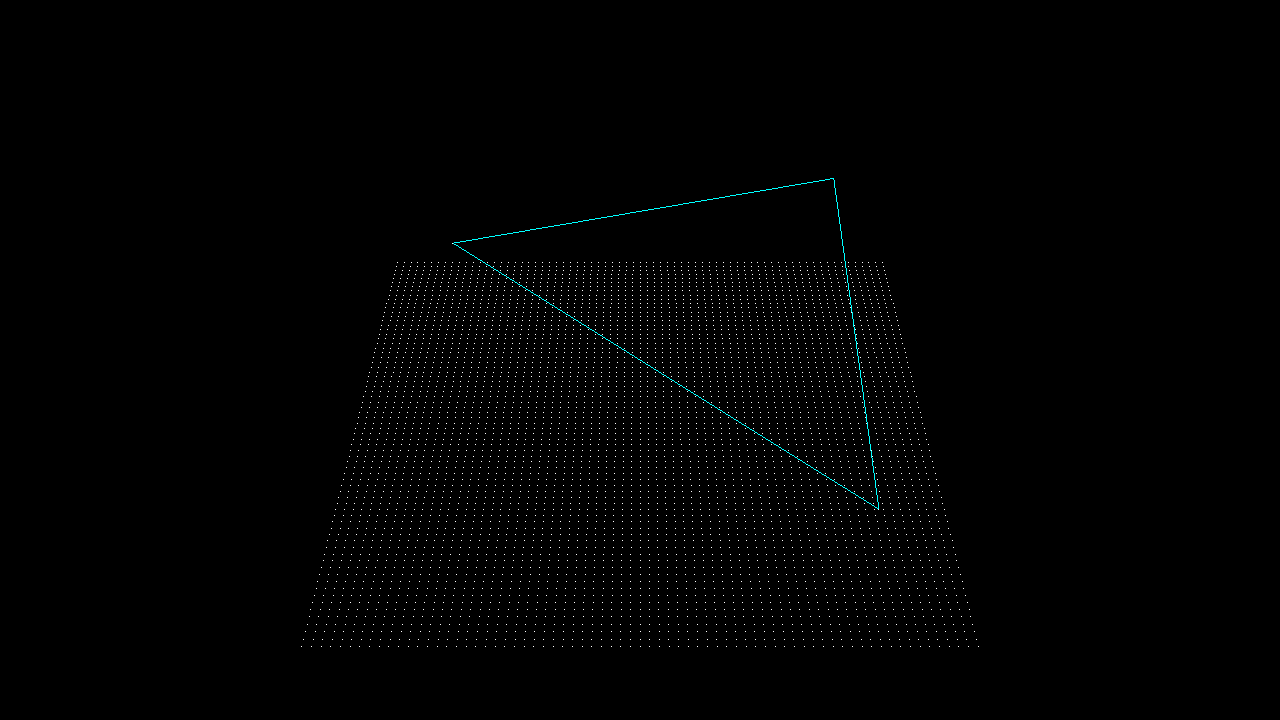
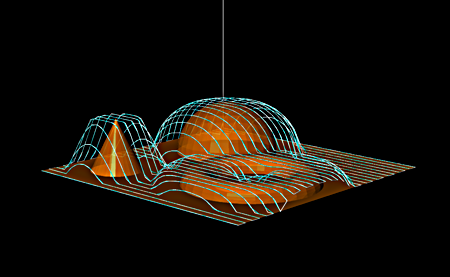
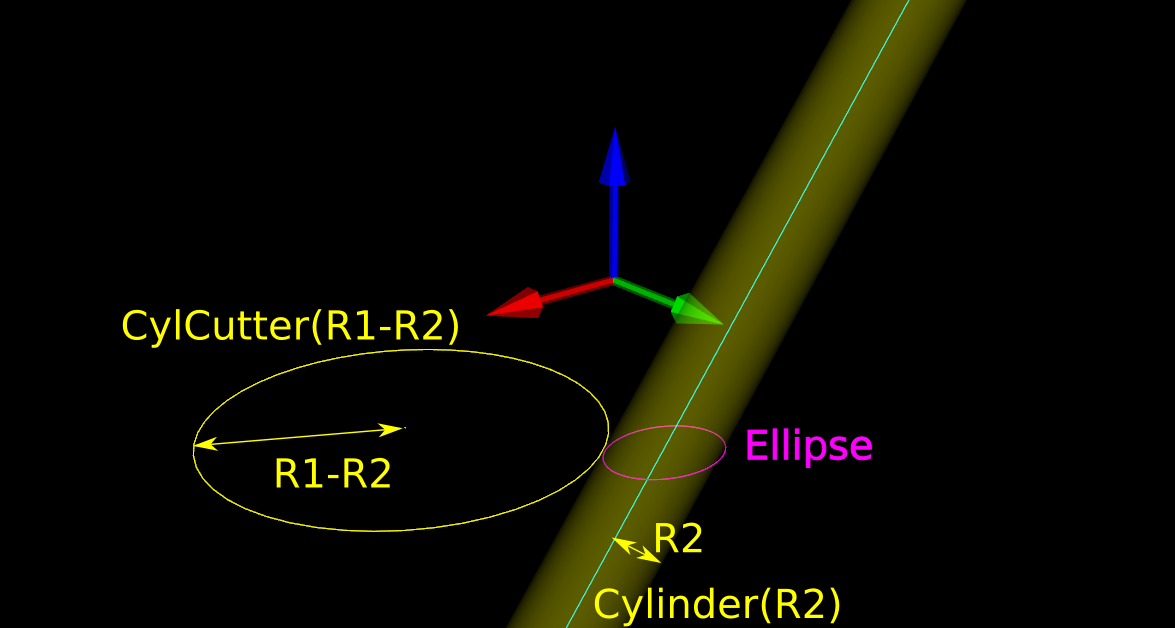
The special cases where we contact the flat bottom of the cutter, or the cylindrical shaft, are easy to deal with. So in the general case where we make contact with the toroid the geometry looks like this:

oe1_text

Here we've fixed the XY coordinates of the cutter location (CL) point, and we're using a filleted endmill of radius R1 with a corner radius of R2. In other words R1-R2 is the major radius and R2 is the minor radius of the Torus. The edge we are testing against is defined by two points P1 and P2 (not shown). The location of these points doesn't really matter, as we do the test against an infinite line through the points (at the end we check if CC is inside the P1-P2 edge). The z-coordinate of CL is the unknown we are after, and we also want the cutter contact point (CC).

There are many ways to solve this problem, but one is based on the offset ellipse. We first realize that dropping down an R2-minor-radius Torus against a zero-radius thin line is actually equivalent to dropping down a zero-minor-radius Torus (a circle or 'ring' or CylCutter) against a R2-radius edge (the edge expanded to an R2-radius cylinder). If we now move into the 2D XY plane of this circle and slice the R2-radius cylinder we get an ellipse:

oe3text

The circle and ellipse share a common virtual cutter contact point (VCC). At this point the tangents of both curves match, and since the point lies on the R1-R2 circle its distance to CL is exactly R1-R2. In order to find VCC we choose a point along the perimeter of the ellipse (an ellipse-point or ePoint), find out the normal direction, and go a distance R1-R2 along the normal. We arrive at an offset-ellipse point (oePoint), and if we slide the ePoint around the ellipse, the oePoint traces out an offset ellipse.

oe4_text

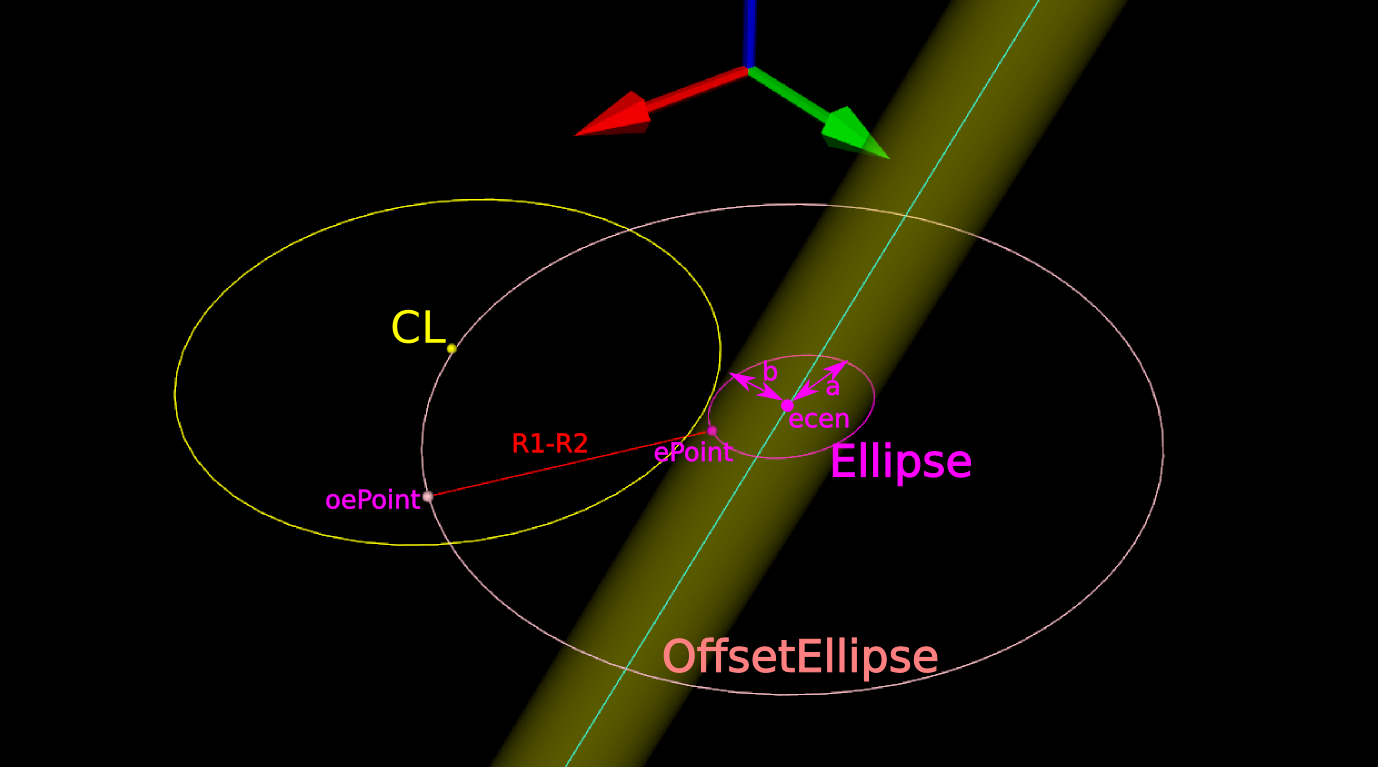
Now for the shocking news: an offset-ellipse doesn't have any mathematically convenient representation that helps us solve this!
Instead we must numerically find the best ePoint such that the oePoint coincides with CL. Like so:

oe5text

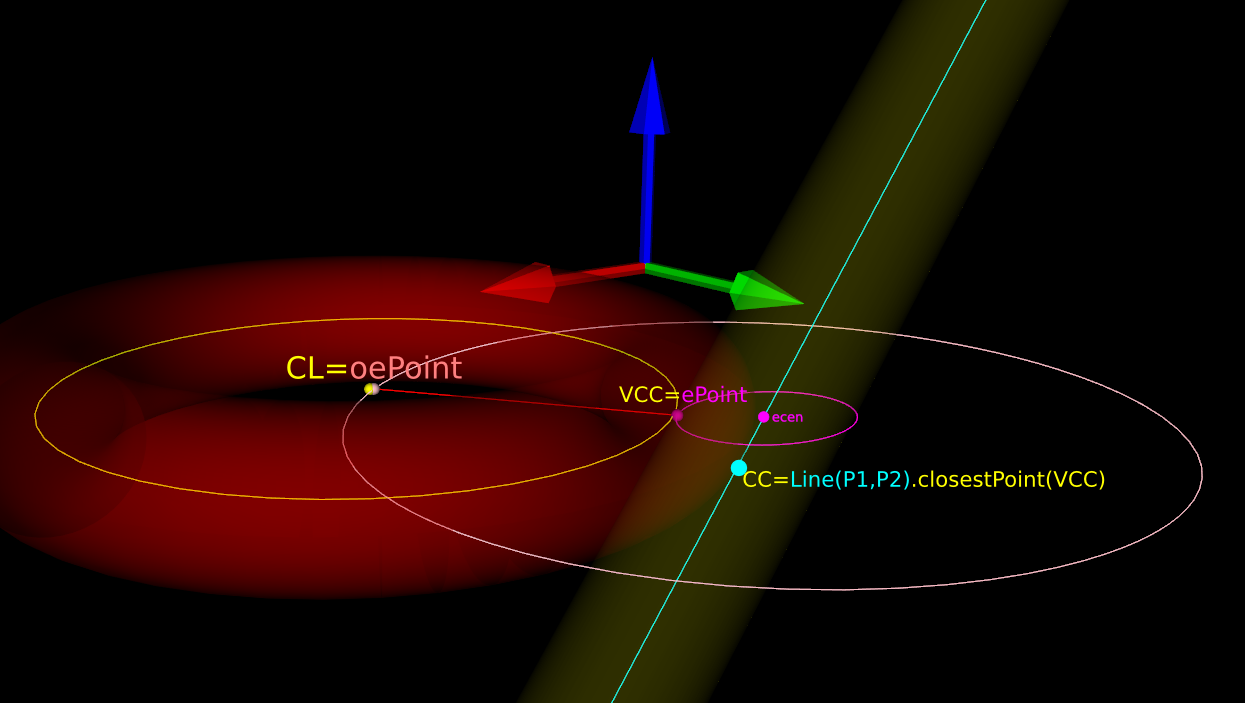
Once we've found the correct ePoint, this locates the ellipse along the edge and the Z-axis - and thus CL and the cutter . If we go back to looking at the Torus it is obvious that the real CC point is now the point on the P1-P2 line that is closest to VCC.

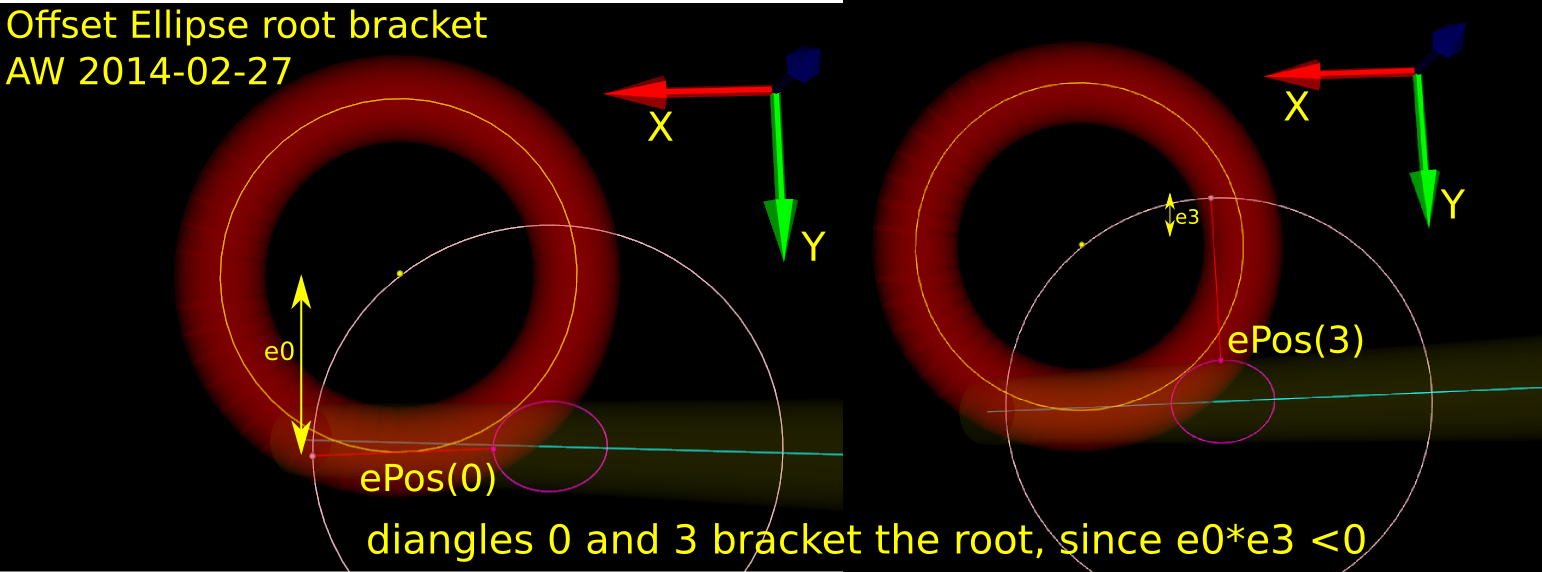
In order to run Brent's root finding algorithm we must first bracket the root. The error we are minimizing is the difference in Y-coordinate between the oePoint and the CL point. It turns out that oePoints calculated for diangles of 0 and 3 bracket the root. Diangle 0 corresponds to the offset normal aligned with the X-axis, and diangle 3 to the offset normal  aligned with the Y-axis:

oe_bracket_drawing


Finally a clarifying drawing in 2D. The ellipse center is constrained to lie on the edge, which is aligned with the X-axis, and thus we know the Y-coordinate of the ellipse center. What we get out of the 2D computation is actually the X-coordinate of the ellipse center. In fact we get two solutions, because there are two ePoints that match our requirement that the oePoint should coincide with CL:

oe_2d_drawing


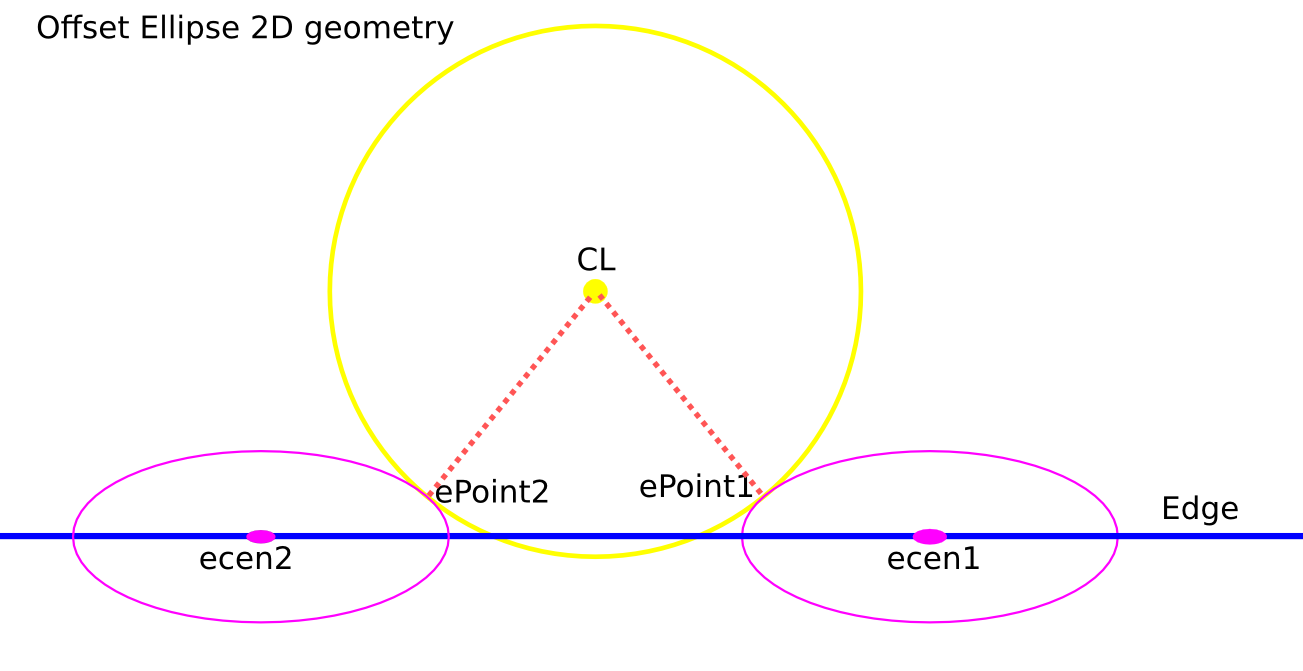
Once the ellipse center is known in the XY plane, we can project onto the Edge and find the Z-coordinate. In drop-cutter we obviously approach everything from above, so between the two potential solutions we choose the one with a higher z-coordinate.

The two ePoint solutions have a geometric meaning. One corresponds to a contact between the Torus and the Edge on the underside of the Torus, while the other solution corresponds to a contact point on the topside of the Torus:

I wonder how this is done in the recently released pycam++?

Spherical drop-cutter

For spherical cutters (a.k.a. ball-nose), the vertex-test (green dots), and the facet-test (blue dots), are fairly trivial. The edge-test (red-dots) is slightly more involved. Here, unlike before, I tried doing it without too many calls to "expensive" functions like sin(), cos() and sqrt(). The final result of taking the maximum of all tests is shown in the "all" image which shows cutter-locations colour-coded based on the type of cutter-contact.

The logical next step is the toroidal, or bull-nose cutter. Again the edge-test is the most difficult, and I never really understood where the geometry of the offset-ellipse shows up... anyone care to explain?

Youtube vs. Vimeo

I've continued to translate into C++ the old cam-experiments I wrote in C#. The kd-tree search for which triangles lie under the cutter seems to work, and the best way to visualize what is going on is through a video. Trying Vimeo for a change, to see if it's any better than youtube for these CAD/CAM-visualizations, since they advertise HD.

There are 360 original frames captured from VTK, and the original was created with

mogrify -format jpg -quality 97 *.png

followed by (copy/pasted from some site google found for me...)

mencoder mf://*.jpg -mf fps=25:type=jpg  -aspect 16:9 -of lavf -ovc lavc -lavcopts aglobal=1:vglobal=1:coder=0:vcodec=mpeg4:vbitrate=4500 -vf scale=1280:720 -ofps 30000/1001 -o OUTPUT3.mp4

If anyone knows something better which produces nice results on youtube or vimeo, let me know.

The original is 1280x720 pixels, so it's better to jump out of the blog to watch the videos in native resolution.

Youtube: http://www.youtube.com/watch?v=k3uCpWYm174

Vimeo: http://vimeo.com/10215501

Drop-cutter toolpath algorithm development, part1 from anders wallin on Vimeo.

OK, so the video doesn't really show what is going on with the kd-tree search at all 🙂 . It only shows two toolpaths, one coloured in many colours which is calculated without the kd-tree, and another one (offset upwards for clarity) that is calculated, much faster, using the kd-tree.

Drop-cutter again

This is about my third rewrite of this fairly simple cam-algorithm where the cutter is dropped from above until it touches a triangle. It's now in C++ with Boost-python bindings and with visualization using vtk.

The cutter-location points are calculated by bringing the cutter into contact with the vertices of the triangle (green cl-points), the edges (red cl-points), and the facet (blue cl-points). Then the cl-point with the highest Z-value is selected as the final cutter location. At the white points we did not make contact with the triangle at all.

If you look closely enough, all surfaces in the world are made of triangles, even Tux:

Due to compression, the video might not show enough detail, so here's a screenshot:

frame059

I wonder if anyone is still interested in this stuff? Given enough time I would like to develop waterline-paths and an octree-based cutting simulator also. It would help if these algorithms were incorporated in a CAD-program, or someone would develop a GUI.

Mowing video moved

Jumpcut is closing, so I needed to move this video to youtube. This relates to my earlier posts here
http://www.anderswallin.net/2007/12/mowing-tactics/
and here
http://www.anderswallin.net/2007/06/an-emergent-spiral/

When I find time to work on this next, there are many ideas for improvements: How to specify only climb/conventional milling (allowing only the right or left side of the cutter to be used). Using a variable step length for the simulation. Simulating dynamics of the macing (controlling the tool with a trajectory generator with acceleration/speed limits etc). How to implement rapid feed between cutting moves? how to choose among many allowed starting points for the cut? Should this use an adaptive resolution model, like a quad-tree? How should G-code be output, a filter which outputs G-code within a specified tolerance of the simulated path would probably be best?

Timing build_kdtree()

Drop-cutter requires a fast way of searching for triangles under the tool. A kd-tree (4-dimensional in this case) is suggested by Yau et al. I've tried to implement one here (look in trunk/Project2). Just ran some timing tests using Stopwatch() on it, and indeed the build_kdtree() function which takes a pile of triangles as input and generates a kd-tree seems to run in O(N*log(N)) time as it should.

I've never drawn this type of plot before, and I was surprised at how close N*log(N) is to N - in a loglog plot they are almost equal!

This is a recursive function. I wonder if there's a good way of multi-threading recursive functions? My laptop is dual-core and a modern desktop PCs is likely a quad-core - so let's try to write these things multi-threaded from the start.

Next up is a function for doing the orthogonal range-search for triangles that lie under the tool. That's supposed to run in O(N^(1-1/D)+K) time, where D is the dimension of the tree and K is the number of reported triangles - so O(N^(3/4)+K) in this case. I'll try to get that done during the weekend.

Z-map model for 3-axis machining

I've been reading about the z-map model for 3-axis milling. A working simulation environment would be very useful for CAM algorithm development. Coarse errors in the algorithms can be spotted by eye from the simulation, and a comparison of the z-map with the original CAD model can be used to see if the machining really produces the desired part within tolerance.

Jeff Epler hacked together a z-map model with EMC2 a while ago: gdepth. Perhaps some code/ideas can be borrowed from there.

The z-map can also be used for generating the tool paths themselves (similar to bitmap-mowing here, here and here), but that's more advanced and not the immediate goal.

Here's the z-map model, a lot of vectors standing upright in the z-direction, getting cut (or mowed down) by the moving tool. For graphics you could fill each space between four z-vectors with two triangles and display an STL surface. Obviously this works only for 3-axis machining where the tool is oriented along the z-axis, and the tool must also not produce undercuts (e.g. T-slot milling).

So how do you cut down the z-vectors for each move in the program? For linear moves you can always rotate your coordinate system so it looks like the figure above. The movement is along the x axis, with possibly a simultaneous move in the z-axis. At the beginning of each move (A) and at the end (C) it's very simple, you just calculate the intersection of the relevant z-vectors with a stationary tool at A and C, a kind of 'inverse drop-cutter' idea.

The surface the tool sweeps out during the move itself (B) is more difficult to deal with. The mathematics of the swept surface leads to an equation which most people seem to solve numerically by iteration. I'd like to go through the math/code in a later post (need to learn how to put equations in posts first!).

It's not smart to test all z-vectors in the model against the tool envelope of each move. So like drop-cutter where you are searching for which triangles are under the tool, in z-map you want to know which z-vectors are under the tool envelope. One strategy is simple bucketing, but perhaps if a kd-tree is developed for drop-cutter the same algorithm can be used for z-map.

Obviously the z-map has a finite resolution. Increasing the linear resolution by some factor a requires a^2 more z-vectors, storage, and calculations. A better way might be to insert more z-vectors only where they are needed. That's the places on the model where the z-coordinate changes a lot. So here (view from above) for example if you are milling with a cylindrical cutter more z-vectors are needed along the edge of the tool envelope. (I have no idea why they are inserted in a tilted grid-pattern in the above figure...). This potentially leads to much reduced memory/calculation requirements, while still producing a high resolution model. As the simulation progresses there are probably also regions where some densely spaced z-vectors could be removed. Maybe a 'garbage-collector' process could go over the model every now and then and look for flat areas (xy-plane like regions) where less z-vectors are needed and remove them.

A lot of papers use this APT tool when deriving the equations for machining or simulations. By varying the parameters suitably you get the familiar tool shapes below:

From left to right: Bull-nose/filleted/toroidal, Round/ball-nose/spherical, drill/countersink, tapered, and cylindrical.

My earlier drop-cutter explanations and code only work with the toroidal, spherical, and cylindrical cutters. I'm not sure if it makes sense to write the code for the general APT cutter, or if it's better to optimize for each case (cylindrical and spherical are usually quite easy).

If anyone has made it this far, my sources are the following papers - which are available from me if you ask nicely by email.

Mowing Foam

Dan Egnor sent me this nice example of bitmap-based toolpath generation, or 'pixel mowing'. It's a slightly exaggerated topographic relief of San Francisco machined in tooling board using a very simple 'lawn mowing' toolpath generator.

The explanation of how it works below is mostly Dan's, not mine.

This is the input to the toolpath generator for one of the Z-slices.

black - material which must not be touched
green - to be removed, is safe (at least one tool radius from black)
yellow - remove if possible, is dangerous (within tool radius of black)
purple - has been cleared, is dangerous (machine limits or similar)
white - has been cleared, is safe, is not blue (below)
blue - this spot has been cleared, and is safe, but is within one tool radius of material that needs clearing (green or yellow)

Note that you don't see blue in either "before" or "after" images, it only occurs transiently. (In theory it could show up in "before" as area outside the workpiece.)

And this is the resulting toolpath. Green circles are plunges and red circles are lifts. The thick grey lines represent actual cuts, the thinner lines are rapid feeds.

The basic rule is that the tool *centroid* is only allowed to visit safe areas (green, blue, and white). Green and blue represent work to be done (safe areas that need visiting). Of course, as the tool moves, green changes to blue and white, and (some) yellow changes to purple.

The real trick is in efficiently tracking the "within tool radius of" zones (material to be cut, or material to stay away from). Every pixel keeps a count of how many pixels of each type ("nearby-blocking" or "nearby-cutting") are within one tool radius of that pixel. Whenever a value is changed ( e.g. the simulated tool moves and changes some points from "cut" to "clear"), every counter within the appropriate radius is updated.

That would be rather costly to implement directly, each simulated pixel move would require N^3 updates, if N is the diameter of the tool. Instead those counters are only kept as *differences* between each point and its neighbours. That means changing a point only requires updating the values along the *perimeter* of the radius surrounding that point, meaning that a simulated pixel move only requires N^2 updates, which makes things a lot more tractable (though it still takes the old laptop I use a couple minutes to complete the toolpaths for a 5" x 3" x 1.5" model at 1/256" resolution). Of course this means that the "color state" isn't directly accessible for a random pixel, but must be figured incrementally from neighboring values. Fortunately most operations don't access random pixels.

You would probably not want to cut metal with this kind of algorithm as there is no control over material removal rate or cutting forces, but for foam, tooling-board, or wood it should work ok.

Dan's program is written in C++ and available here (http://svn.ofb.net/svn/egnor/boring/), but it's not well documented.

We are standing by for a video of this kind of cutting!