People from all over the world keep sending me pictures of their Noux or other IOM projects - many thanks ! Here are a few recent ones:
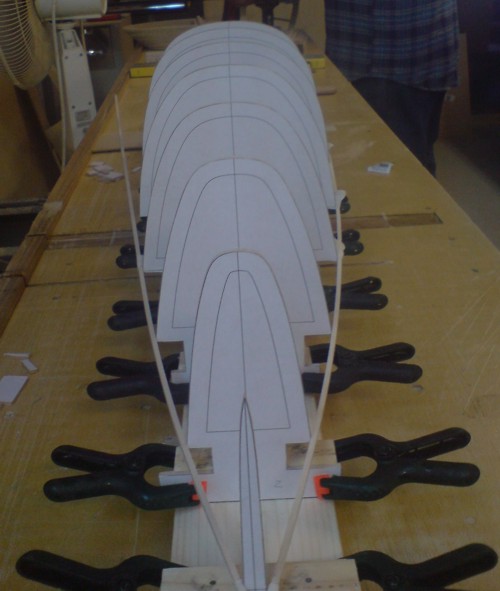
Matt from Australia sent me these two pictures of his planking process:
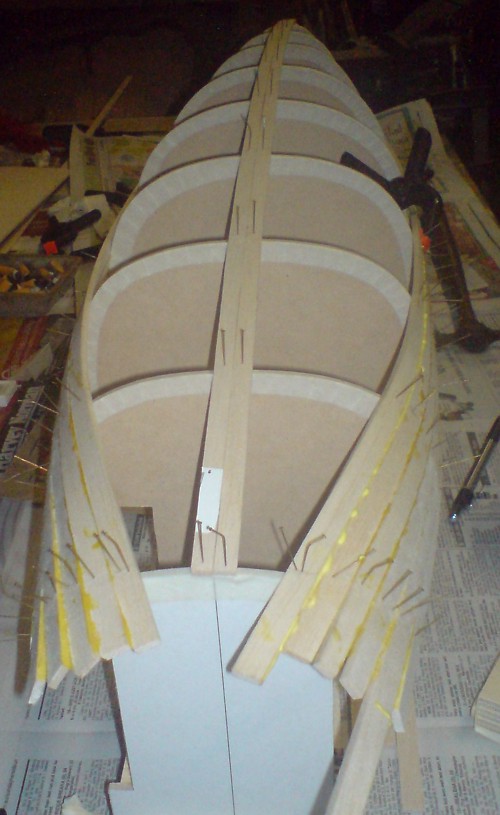
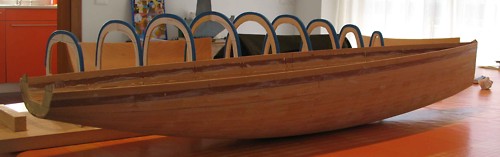
The next two pictures are by Boris from Switzerland who started planking in November and has now completed the hull:

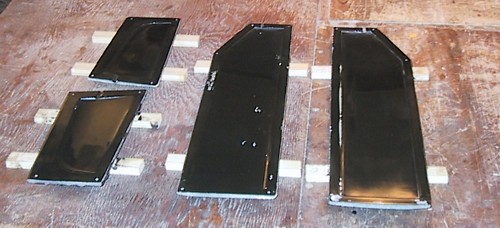
Finally, Steinar from norway has made rudder and fin moulds for his Noux. These are made the old-fashioned way by hand, no cnc-machining...
That's it for now... stay tuned for some cnc electronics updates which I hope will happen soon, and we're also planning a ball-bearing gooseneck fitting for the Noux Mk2 which might be prototyped before next year.
Hallo Anders.
I am a beginner in RC sailing and I plan to build the Noux and there is something that atracted my attention here:
The photos showing the planked hull made by Boris from Switzerland show the planking beeing made on the ribs which do have the contact surface of the ribs (between the rib and planking) covered by plastic tape. Also the next photo shows the finished hull (bottom part) and it seems to me that there are no ribs inside it!
Or am I mistaken???
Please can you explain to me this building technique? I can imagine that the planking wihout beeing glued to ribs could possibly be stiff enough to keep the shape, but only if laminated from outside...
Can you recommend to me any web page where to find the design of the sails and tackelage?
Thank you very much.
J.
I haven't built a wooden boat myself so I can't give you very much advice.
The final hull will need a few sections inside it to keep it stiff, but most of the sections are used just for support while planking.
The Nimbus plan from SailsETC shows quite a lot of construction detail for a planked boat, so you might want to get it. I'm sure there are books that describe the building method too. Chris Jackson's Radio Controlled Racing Sailboats book has about 10-12 pages on building a planked hull.
I have just pulled a planked hull from the forms, alas, not a Noux. After the planking, using CA glue on each plank edge, and sanding the balsa smooth, I epoxied a layer of 4 oz/yd2 S-glass on the hull. Once cured, I was able to remove it from the form, and vacuum bag a layer of 2oz glass tot he inside. The hull is plenty stiff! The weight is similar to the weight that Anders has figured for his Noux. Once the deck is on, only spot bracing will be needed in high stress areas.
To all plankers
I've just completed a 70% Learke to sail with a group of Strathclyde 70 sailers using essentially modified Wee Nips (photo to come later). Planking over shadows can be difficult, and later a pain to fill if using pins to hold while gluing. You will always just miss the centre of the shadow and split the former. Like Hew Hamilton I use CA and developed some little builders helpers. Simply 'bulldog clips' with a small piece of wood CA'd inside the spring. You need quite a few but they couldn't be cheaper. Clip the 'clip' over the shadow and the small piece of wood will hold the plank firmly while you fit and adjust the plank and then spot the CA. I only spot between the shadows, not over them. The planks do not stick to the shadows and hold for long enouch off to take off the hull, cover the shadows with 'clingwrap' replace the hull then paint the hull with an 80% Wests, 20% MEK undercoat for the final glass. This coat will fill be useful to hold all together for final sanding before glassing. I have also found it usefull to build the hull a further 20mm down the side of the shadows. It can be cut off later but is very usefull in streaching the outer glass very tight against the hull and spotting the glass to the balsa in that 20mm with CA before final painting over with 100% Wests.
If Anders reads this and tells me how to post a photo of the clips into the reply form I'm happy to do so.
And here's another way. Coat the edges of the shadows with furniture wax so the planks cant stick to them. Cut the planks and bevel the edges so they are a nice fit against each other. Glue the plank edge to the previous plank and using fine pins, pin them to the shadows, When the hull is complete we varnish the outside with two pack poly and get a good finish on it and then remove the hull from the shadows. Lay a thin layer of epoxy inside the hull, then using glass tape about 20mm wide maximum we laminate a tape from one side to the other where the pinholes are. They seal the holes and also act like ribs to stiffen the boat. Works perfectly with red cedar but with balsa a layer of fine glass cloth outside would be a good idea and the weight difference would unlikely to be much.
Another tip is to make the gunwhale plank double thickness and recess half of that thickness into the shadow. Then you dont have to fiddle around fitting an inwale after.