A short description of how we cast bulbs.
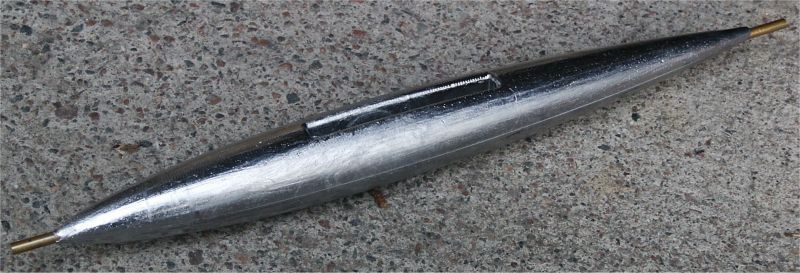
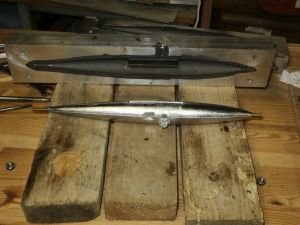
Desing your bulb with a CAD program. Our bulb has a round cross section with a NACA 0010-34 profile.
Length 355 mm
Max diameter 38 mm
supported by solid 5mm brass rod
Target weight 2400 g
See also: Simple Bulb Design and IOM Bulb Mould Plans
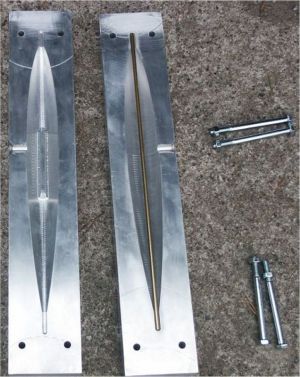
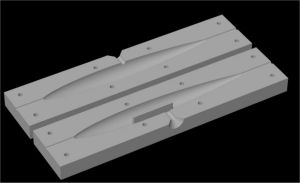
Find someone who owns or has access to a suitable CNC Mill and talk very nicely with him/her(commercial alternatives are likely to be very expensive, estimate ca 1000 EUR or USD). Hopefully the end product will look something like this. Molds are from solid aluminium and the final milling pass was made using a 5 mm ball nose mill.
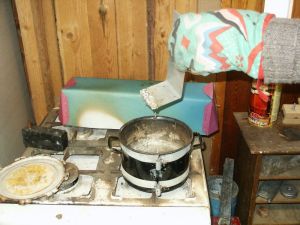
Go outside. Heat up a suitable amount of lead using a gas-stove (old, not in kitchen use !). The temperature of the flame is just enough to melt the lead so the temp. outside needs to be at least 15 C or so. Put the mold on the stove also, the lead will pour in and fill the mold much better if it is warm.
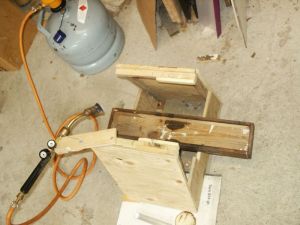
Build yourself a stand for the mold and figure out how you're going to be pouring the lead etc...
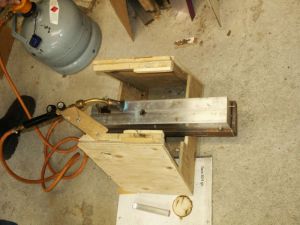
We use a gas flame to keep the input hole to the mold warm.
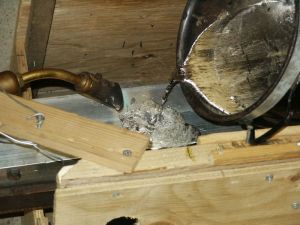
Now it's time to pour in the lead. Be very careful... pour until the mold is full. Leave the gas flame on and you will notice that as the lead cools it contracts and after a while you can pour some more.
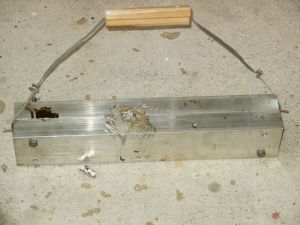
Let the mold cool down for at least 30 minutes or so. A metal handle system helps when moving the mold around.
Loosen the bolts, open the mold and carefully tap with a small hammer and the bulb will come out.
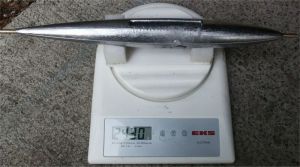
The IOM class rules limit the weight of the keel (fin+bulb) to 2500g. A typical fin weighs maybe around 100-130 g so the target weight of a bulb should be around 2400g. This individual seems to weigh around 2430g which is OK.
If everything went well the final product should look something like this. We have had some problems with the lead not filling the mold perfectly but this has been solved by properly heating the mold before pouring and by adjusting the tilt angle of the stand/jig. The color is quite shiny in the beginning but as the lead oxidizes it will go back to the more familiar dark gray. Some have suggested coating the bulb with clear epoxy to keep this shiny look.
Update 2005 October:
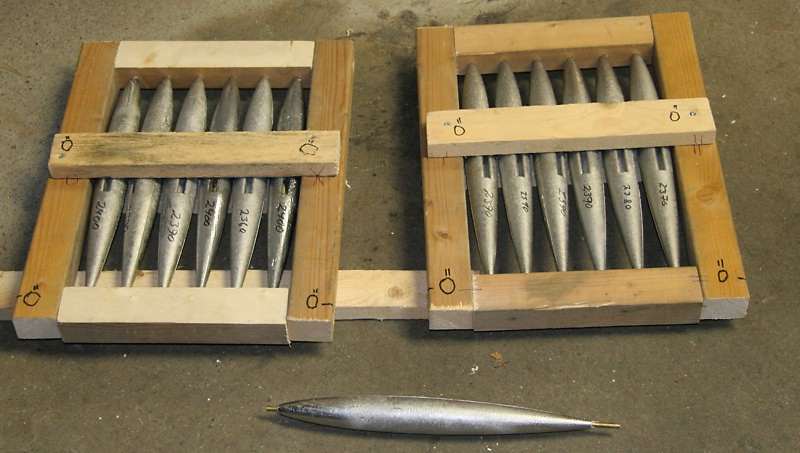
Our largest bulb order to date ! 12 bulbs in one go. Had to build some wooden frames to ease the transportation. The overlong brass rods make the bulbs easier to tranport.
Hi Anders, i'm Boris new IOM sailor from Switzerland. May I buy bulb diretc from you ? If yes how much is with shipping ? Thank you for an answer and sorry about my bad english.
Good wind Boris SUI-15
These bulbs are manufactured and sold by Olof Ginström (olof.ginstrom (at) luukku.com). The price is 30euros per bulb + postage and packing. The postage and packing to switzerland is likely to be another 30eur.
Hi Anders,
I' ve just finish a bulb folowing step by step your technique.
I made moulds in aluminium using CNC. I was rather satisfied until i verify the weight. My bulb exceeds the target of 300g approximately. One of the mistakes i ve done is probably to have preheated the mould excessively. Advantages of preheating is to keep the input hole warm and the mould retracts with the bulb avoiding shrinkage defaults.
I continue my test and i'll send photos soon.
Hi Kostia,
as described on my bulb design page
http://www.anderswallin.net/2005/06/simple-bulb-design/
the final weight will depend on what material you are casting. we have found that lead with antimon produces a very strong bulb, but its density is around 10.5 g/cm^3 so with pure lead (11.3g/cm^3) this design might be heavy.
I don't think heating an aluminium mould to any reasonable temp would expand the volume so much as to make it 300g overweight.
AW