The logical next step from drop-cutter ("axial tool projection" or "z-projection machining") is to instead push the cutter sideways("radial tool projection") against the model and get waterline (or "z-slice") paths. In addition to waterline finish-paths these paths can be used in roughing where they define pockets for 2D machining/clearing of stock. The general purpose tool-location function would be a non-axial tool projection, but I'm not going there unless someone sends me a state of the art 5-axis VMC as a present!
Push-cutter is different from drop-cutter, because in drop-cutter for 3-axis machining there is always only one right answer. There's one z-height where the cutter is positioned as low as possible, but doesn't interfere with the model. In drop-cutter positioning the tool above this z-height is OK, but dropping it further down is an illegal move which causes overcutting.
In push-cutter we push the cutter along a line (called a "fiber") in the xy-plane, and search for CL-points where the cutter touches a triangle, together with illegal points or stretches/intervals along the fiber where the cutter interferes. There are going to be many of these points and intervals, so the fiber needs to keep track of everything using a list of interfering intervals (the endpoints of the intervals are valid CL-points).
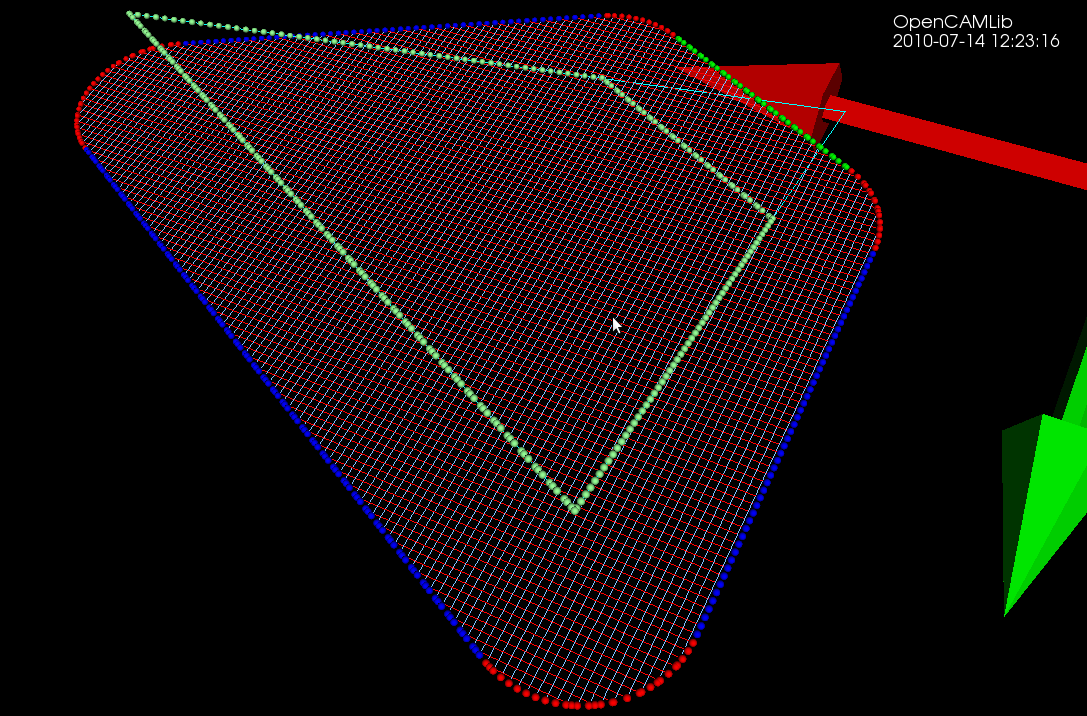
Similarly to drop-cutter, where a path is sampled along points in the (x, y) plane, we now need to build up our waterline-path by inserting closely spaced fibers in the x-direction and the y-direction. Eventually the CL-points start to form a continuous waterline, if we hook up the points into a list in the correct order. The x- and y-fibers form a grid (or mesh/weave), a kind of graph, which can be used to figure out the correct ordering of the CL-points (not implemented yet, see BGL).
This picture shows the original triangle (thin cyan lines), X-fibers (red lines), Y-fibers (blue lines), and the endpoints of the fibers, which are CL-points (colored by which element of the triangle they are hitting: red=vertex, green=facet, blue=edge). The light-green points are CC-points, i.e. points where the cutter makes contact with the triangle. This initial experiment uses a cylindrical cutter, and I expect the spherical cutter to follow soon, while the toroid will be more difficult...
This picture does not show the fibers/weave, only CL-points, calculated at many different z-heights.
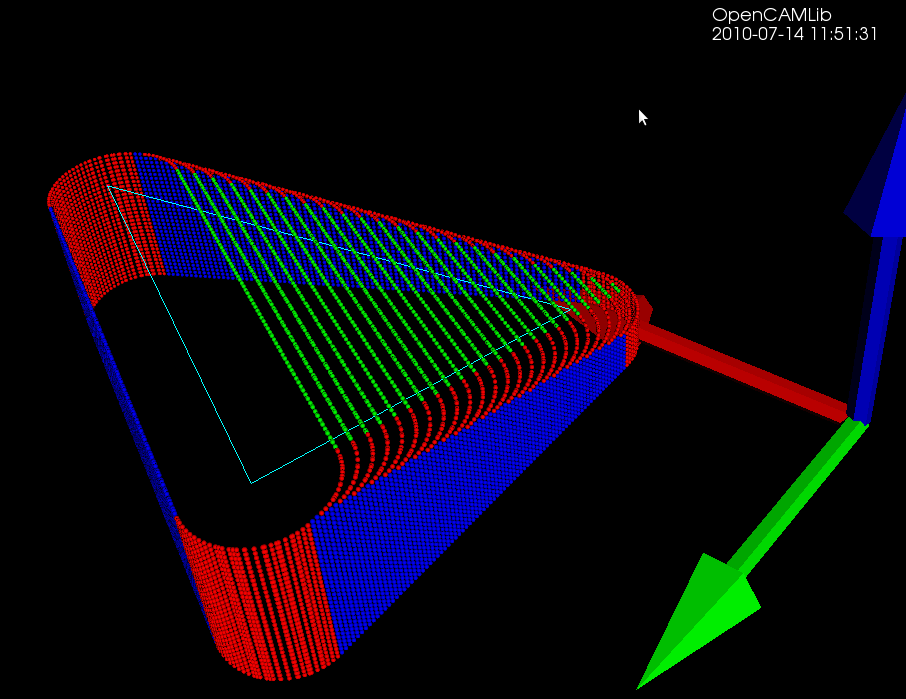
If the low-level functions are written right these ideas extend easily from the one-triangle test and debugging case to the practically more important and interesting many-triangle case: (note how now the weave-graph has three disconnected components)
Coming to an open-source CAM-system near you this summer/fall...
One thought on “Waterline toolpath experiment”
Comments are closed.